
or for help recommending a loom matched to your weaving level and needs.
See our Leclerc Loom Comparison Chart for more help in deciding which loom is right for you.
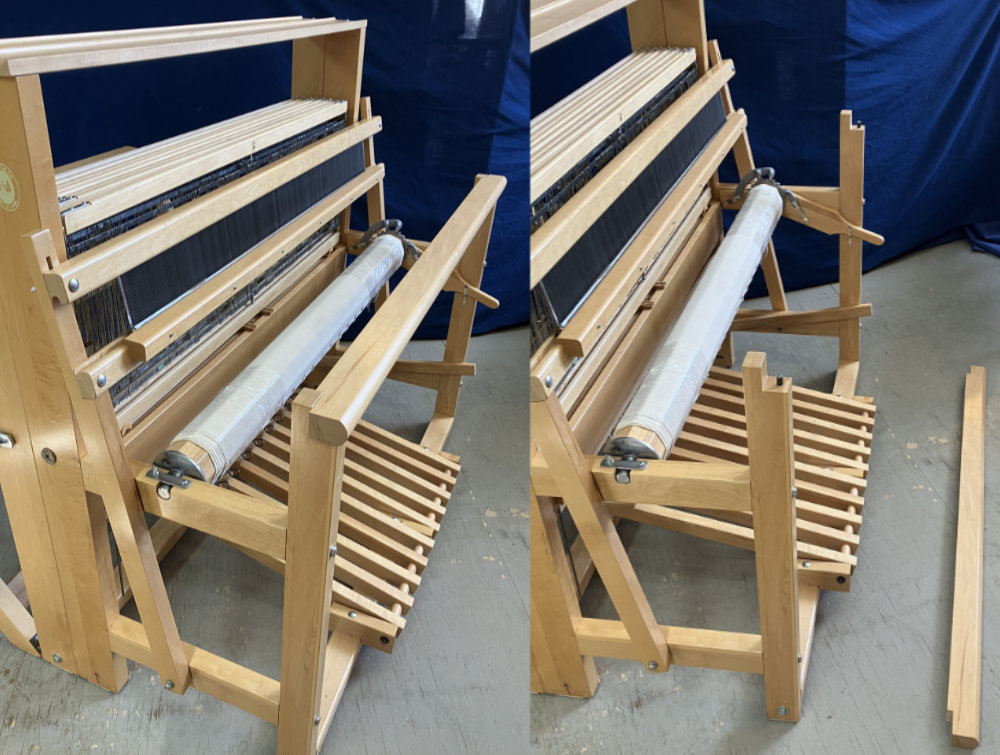
If the loom is being warped Back-To-Front or Sectionally, the front beams of the Leclerc larger floor looms can be removed during the warping process to allow the weaver to sit inside the loom frame to make it easier to thread the reed and/or the heddles.
This process applies to most Fanny, Mira, Nilus, Nilus II, Nilart, Colonial and Weavebird models although the design of some very early models may prevent part of this disassembly. This also shows the removal of the standard lower Beater while the assembly instructions for the Colonial/Weavebird Hanging Beater should be consulted to remove them. The loom in the pictures is a Nilus II with Front Hinge Treadles so the configuration may be slightly different depending on the model.
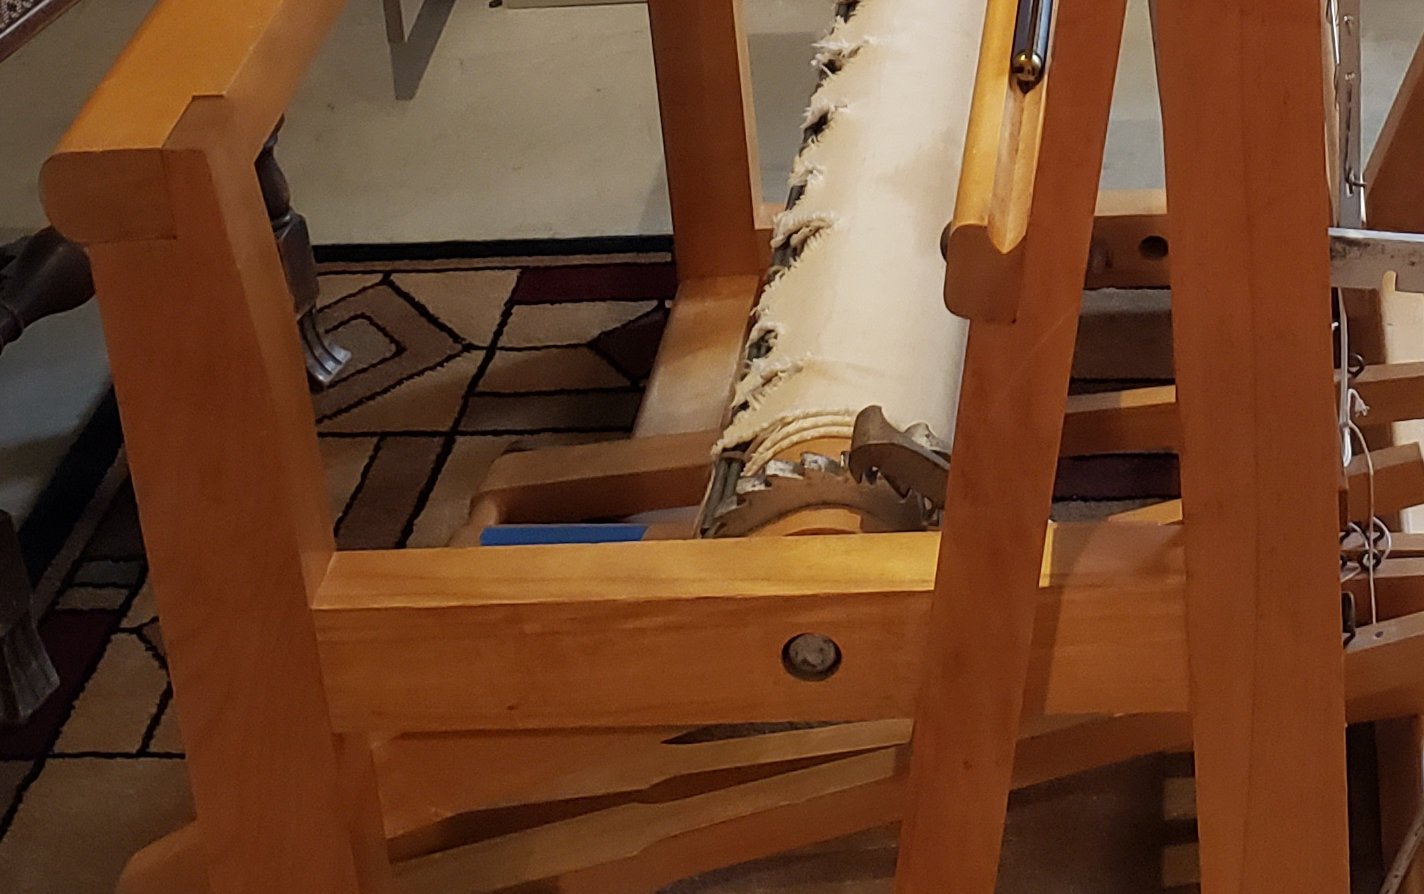
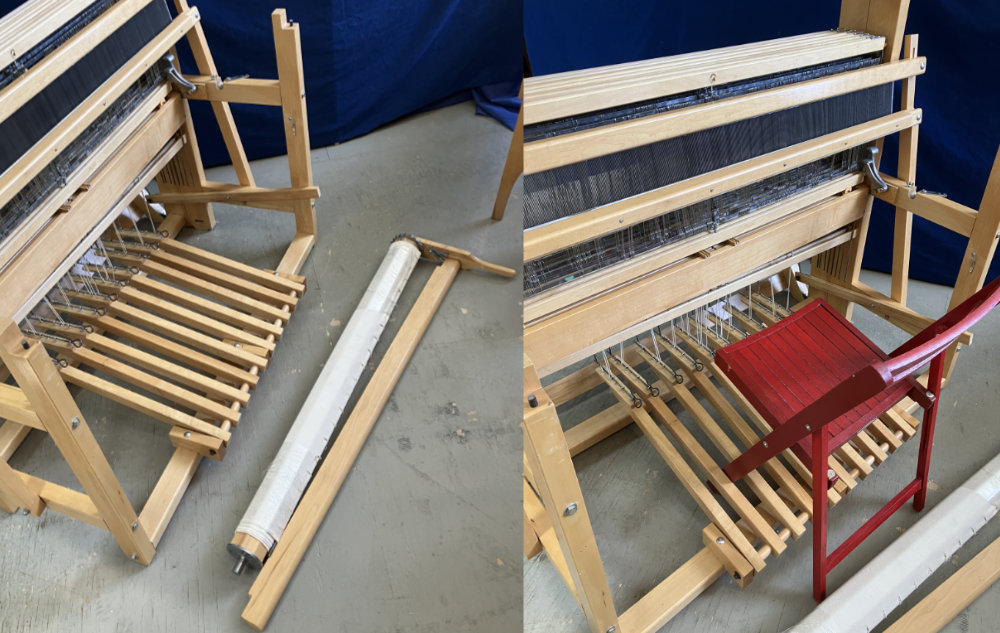
The first step is to remove the front Breast Beam. This wooden bar lifts off the two metal pins on either side without using any tools. After lifting one end off the pin, moving that end of the beam horizontally toward the weaver may make it easier to remove the other, but be careful to only move the end an inch or two horizontally as it is very easy to crack the wood on the other post because of the leverage provided by the length of the Breast Beam. Just lift the other end straight up to remove the beam.
The Cloth Beam sits in a slot in the wooden loom frame and is held in place with a metal latch. By loosening the wingnut, this latch can be folded out of the way. Note that on very early versions of the F-Type (Fanny), M-Type (Mira) and Nilus looms, the cloth beam may go through holes in the frame instead of sitting in slots. This is also true for very early versions of the Colonial loom and on these looms, the cloth beam cannot be removed without partially disassembling the frame. Also note that newer Leclerc looms may have a removeable metal Bushing over the beam ends that is used to reduce friction and control the beam position.
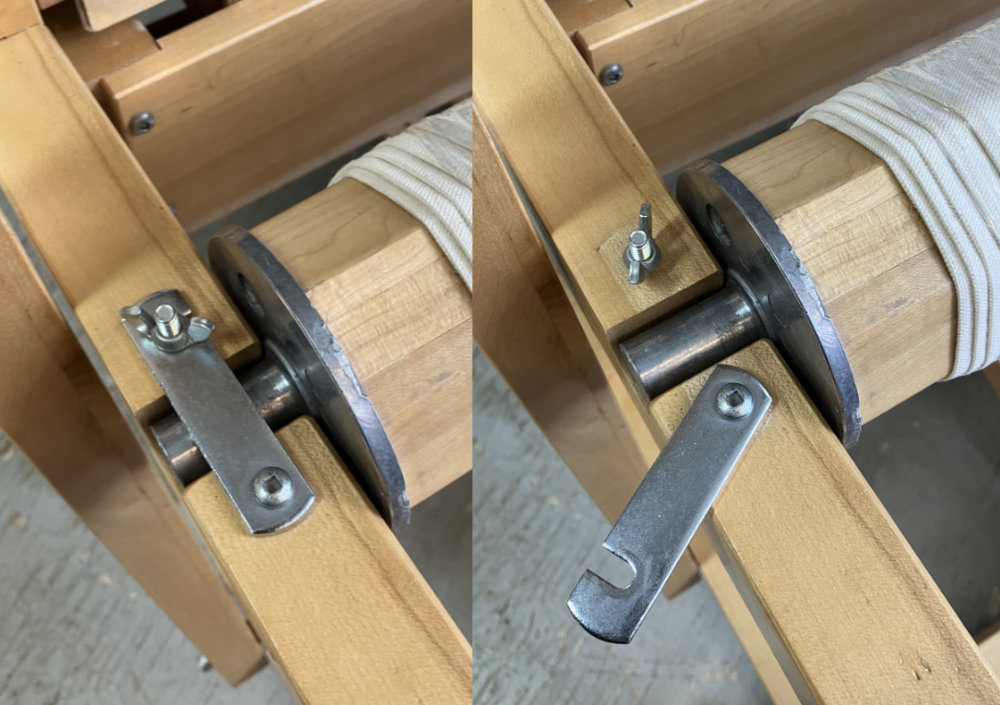
A similar metal latch holds the cloth beam on the right side and loosening the wingnut will allow the latch to move out of the way. The two Frame Pawls can then be pivoted up out of the way. Moving the frame pawls will allow the Cloth Beam to rotate unwinding the Apron and Warp rods so we suggest tying a string around the apron at both ends of the beam before moving the pawls.
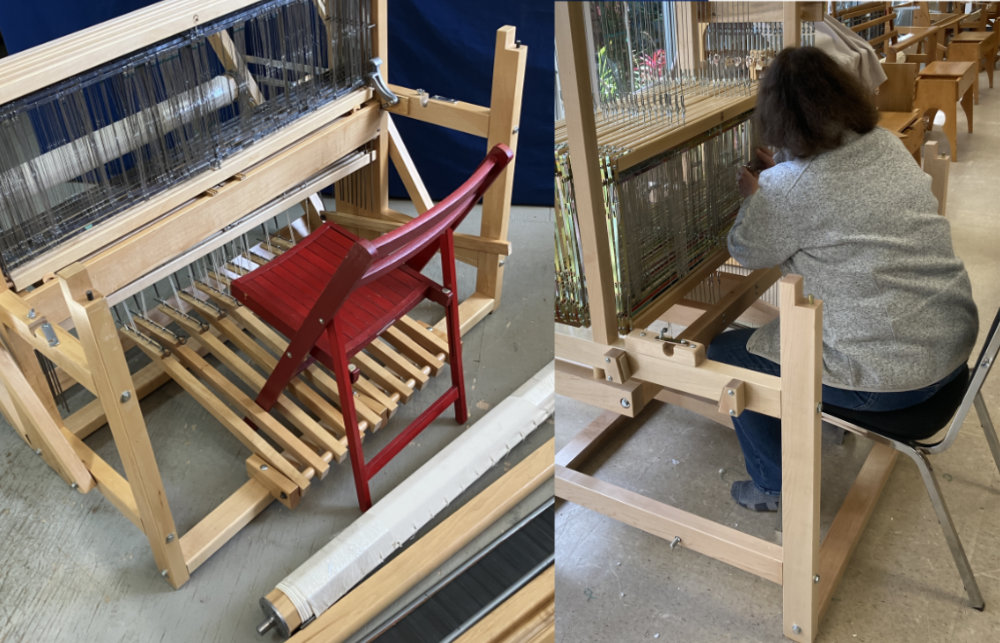
With the Latches on both sides opened and the Frame Pawls out of the way, the Cloth Beam can be lifted out of the frame and then placed out of the way. The Take-Up Motion handle can stay attached to the right side of the Cloth Beam. At this point the weaver can place their chair in the loom and sit between the treadles to access the reed. Note that normally the Treadle Pins are removed to allow the treadles to lower onto the frame so the weaver can rest their feet on them while they work. On the Back-Hinge Treadle looms, the Rocker Cords can also be disconnected to allow the Treadles to lower.
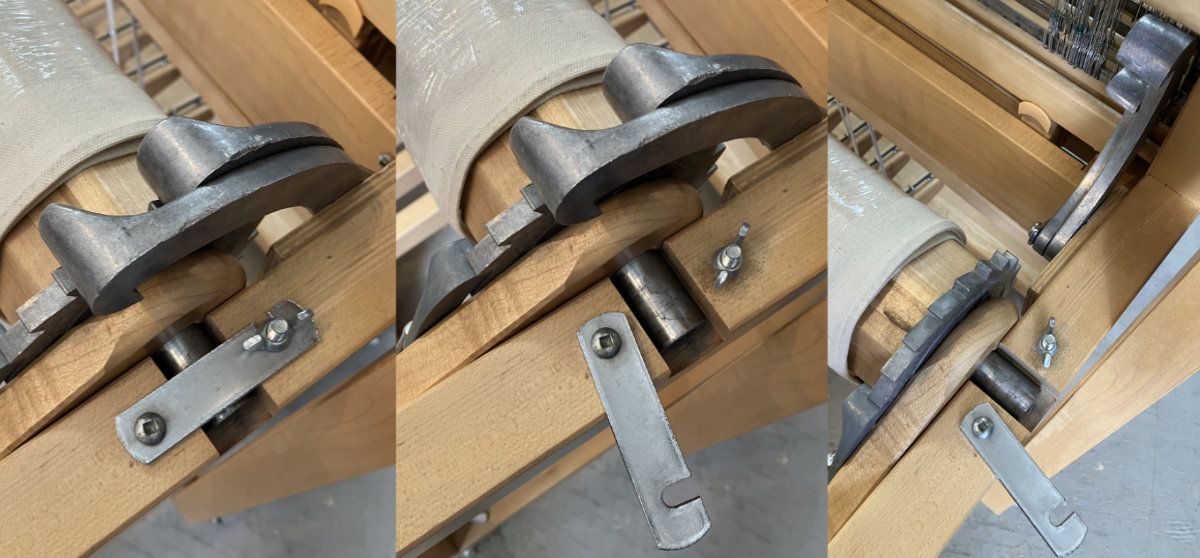
The Wooden upper Beater Batten that sits on top of the Reed can be romoved by fully unscrewing the wingnuts on either side where they attach to the vertical Beater Swords. There should also be a washer and when removed, the Upper Batten can be removed along with the Reed and set aside. To avoid losing the metal parts and to remember which Batten goes on top and which is below we recommend reinstalling the wingnuts and washers on the Batten when setting it aside.
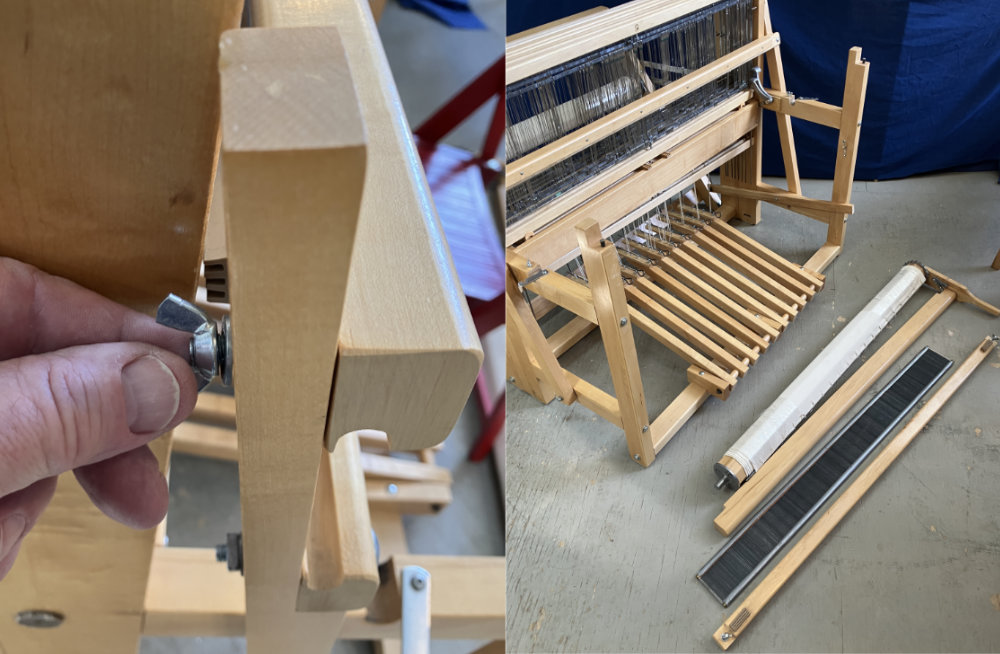
The lower Beater Batten is attached to the Beater Swords in a similar fashion as the upper Beater Batten except that a nut is used so a wrench is required. It is also recommended that a string be tied around the Beaters swords and the upper loom frame as they will fall to the floor when the lower Beater Batten is removed.
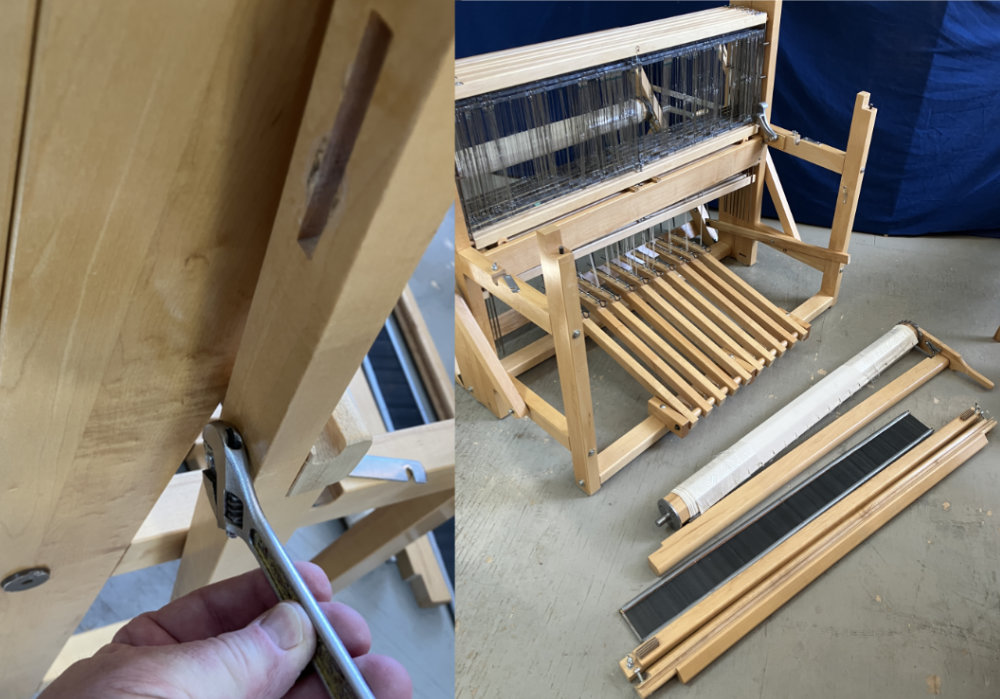
With the Beams and the Beater removed the Shaft Frames and Heddles are now more accessible to the weaver and a chair can be placed inside the loom. Note that the picture does not show the Treadles lowered by removing the Treadle Pins to disconnect them from the Lams. Once the Heddles are all threaded, the Beater and then the Beams can be reinstalled by reversing this procedure. Depending upon the weaver's preferred method, the Beater can be installed first then the reed can be sleyed with the chair in the position shown in step 4.
|
NEED HELP? Contact us for help in answering questions about these products or for help recommending a loom matched to your weaving level and needs. See our Leclerc Loom Comparison Chart for more help in deciding which loom is right for you. |
|
How to Order: Orders may be placed using our secure Online Order Form (this form should open in another window). Click Here for more information on how to place an order as well as our terms and conditions. Payment/Currency: Payment can be made using VISA or Mastercard, Cheque or Money Order in US or Canadian funds. US credit card purchases are billed directly in US funds eliminating any foreign currency conversion charges by the credit card company. Product Directories If you are looking for other items on our website, try using our product directories to quickly find what you are looking for! Our products are grouped as follows: Weaving/Spinning Product Index Books, Magazines & Videos. |
Price/Shipping Quote? If you would like an exact quote for any items complete with shipping costs, please call or email us at nmanners@camillavalleyfarm.com with you location and we will provide this. Gift Certificate If you are looking for a gift for a Knitter or Weaver and can't figure out what they want, a Camilla Valley Farm Gift Certificate is an excellent way to ensure you get the perfect gift! We can also email gift certificates if you are running out of time! Latest News/Updates Keep up to date with what is new at Camilla Valley Farm by following us on Instagram! (Click on the logo below)  |